Mobile Unity SDK
The documentation below contains the technical interface for integrating the api for In App Purchase with unity 3D.
Unity version used to build the SDK 2022.3.20f1
Download the unitypackage
Download the latest version of Unity's Gara Pay package here
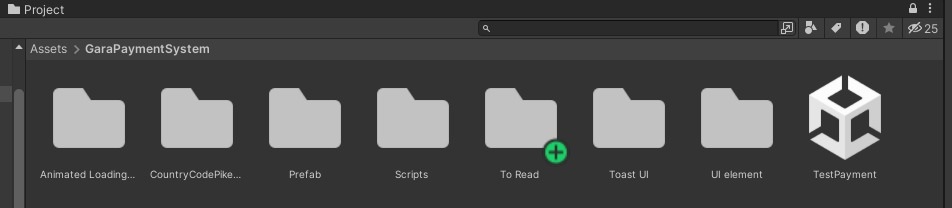
Once the latest version of the unitypackage is downloaded, open the GaraPaymentSystem folder
You should have a structure similar to the following image:
You can test the sdk by opening the testPaymen scene.
Configuration
To load the payment scene, you need to create a “LoadScene” script that will:
- launch the payment scene.
- launch your game scene
- restart the current scene
Use the Load_GaraPayment_Scene() function with a button to load the payment scene.
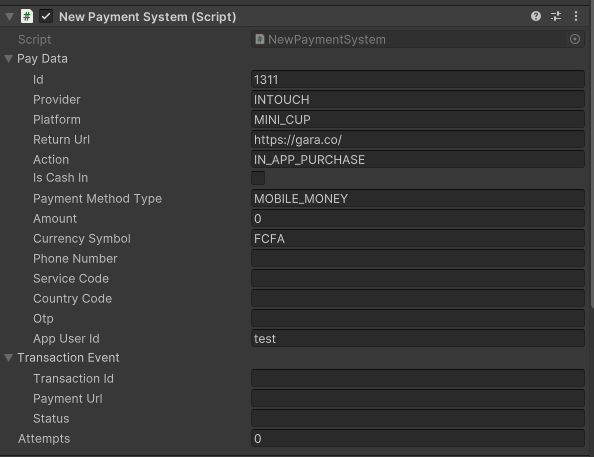
Main settings
- id: This is the game ID in GARA STORE. You get this id after chreating the sheet in the console
- platform: Default value: "MINI_CUP" Replace this value with the name of your game
- returnUrl: Default value: "https://gara.co/" This is the URL that will be launched after payment.
You can leave it blank or replace it with a thank you page on your website or your deeplink - amount: Initial value: 0- This is the purchase price (minimum: 200).- You must enter this value!
- countryCode: This is the abbreviation of the country. For example: FR for France,CI for Ivory Coast.
You can store it in a PlayerPrefs of type string with the key "countryCode". But it is already managed automatically.
- appUserId: User's GARA account ID.- This is the player's ID when they log in to their GARA STORE account.- You can store it in a PlayerPrefs of type string with the key "id"
Leave it empty - attempts: This is the maximum number of attempts before the system fails the transaction.- Default value: 30.- You can increase this value in the code on line 172.
- token: You must have a token and enter it in the
PaymentUiElementscript, in the TOKEN variable. Token is found in your Gara Dashboard.
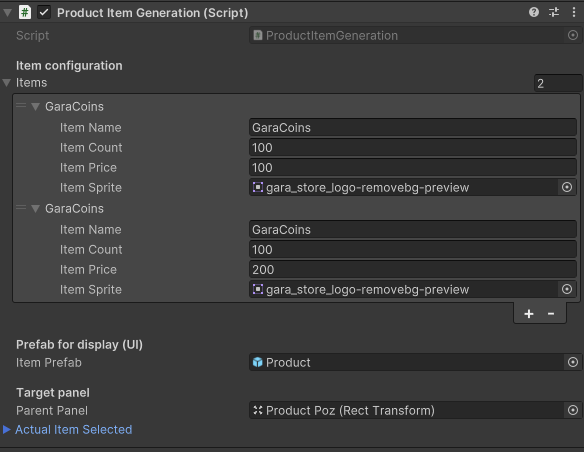
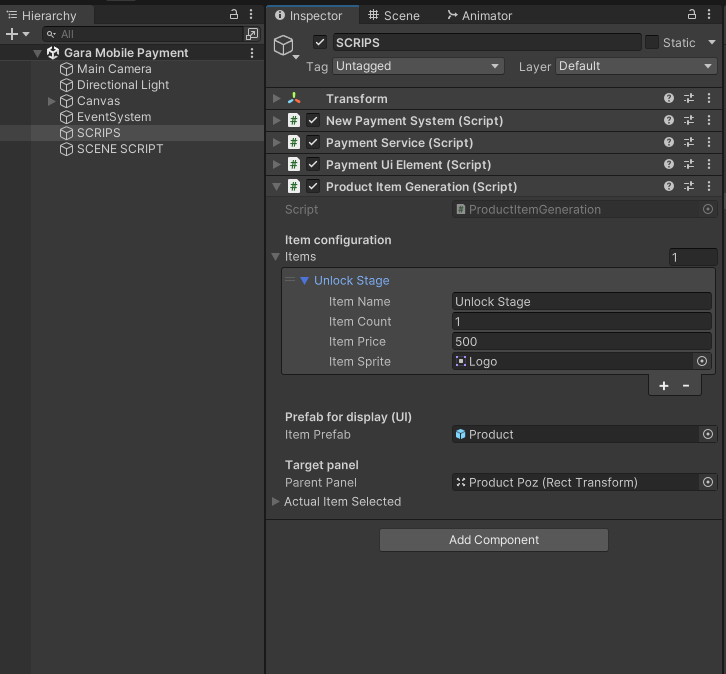
Product Item Generation (script)
This script is used to generate the products to be purchased. You can generate up to 6.
- ItemName : the name of the product.
- ItemPrice : the price of the product.
- ItemCount : the number of units of the product.
After a successful purchase, this number will be added to the item via PlayerPrefs.
Example of updating the inventory :
PlayerPrefs.SetInt(ItemName, PlayerPrefs.GetInt(ItemName) + itemCount)
How to load the payment scene?
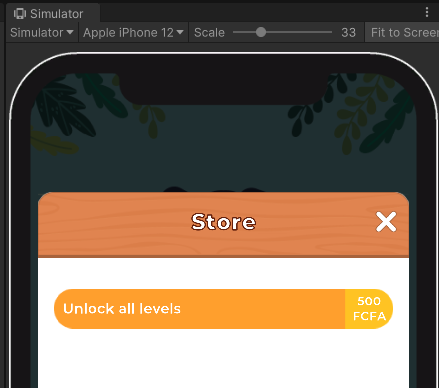
Here we have created a button “Unlock all levels”, this button allows for example the user to unlock all the levels of the game,
for only 500 FCFA.
This button launches the Load_GaraPayment_Scene() function
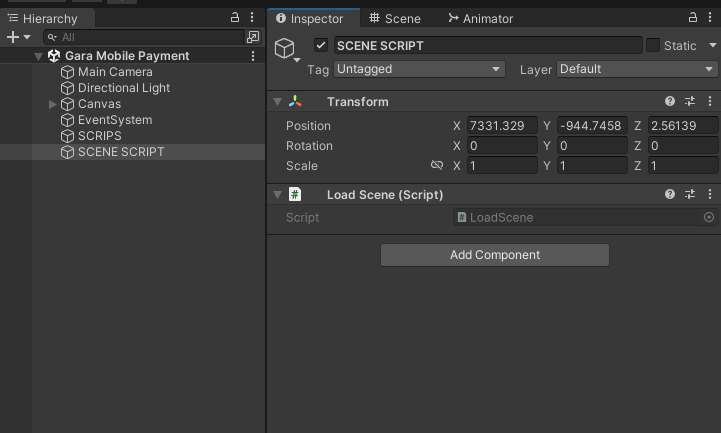
How to configure the payment system?
Go to the GARA payment system scene, in order to configure a paid item.
First Create a gameobject “SCENE SCRIPT” and add the script LoadScene
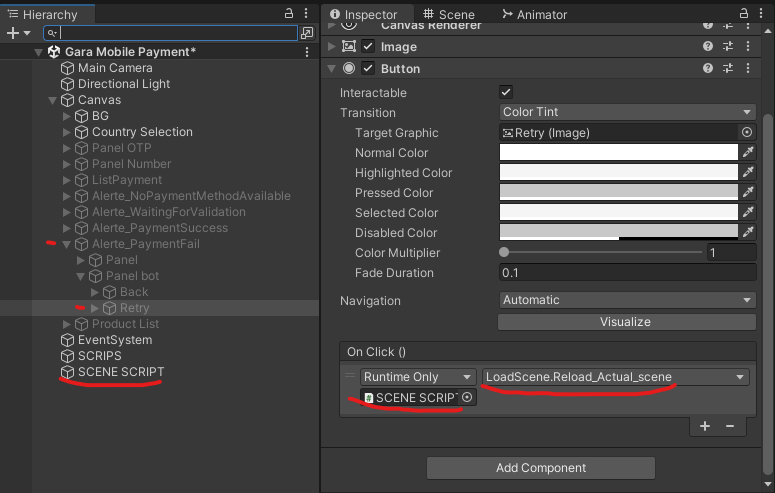
Button Configuration
Open the panel: Alerte_PaymentFail then assign the function Reload_Actual_scene() to the Retry button.
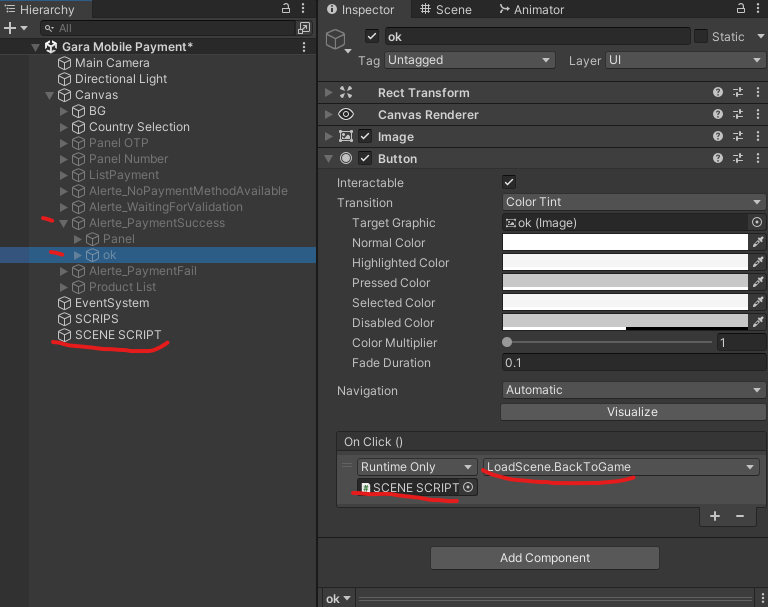
Open the panel: Alerte_PaymentSuccess then assign the function Reload_Actual_scene() to the OK button.
Configuration (purchase item)
Create your shop and your items. Then in the Product Item Generation script add an item.
item name: this is the name linked to the playerpref that will be incremented
item count: this is the number of items that will be added to the playerpref value
item price: this is the price name of the item.
item sprite: this is the icon of the item.
you can create as many as you want.
Explanation
In our demo, the “Unlock all levels” button allows you to unlock all the levels of the game.
The value “Unlock Stage” which is also the name of the added item allows you to know if the player has actually unlocked all the levels or not.
Unlock Stage = 0, means that the item has not been purchased.
Unlock Stage = 1, means that the item has been purchased.
After purchase, the item will be incremented by +1
You can manage it with your own back end system with item count which is 1.
PlayerPrefs.SetInt(“Unlock Stage”, PlayerPrefs.GetInt(“Unlock Stage”) + itemCount)

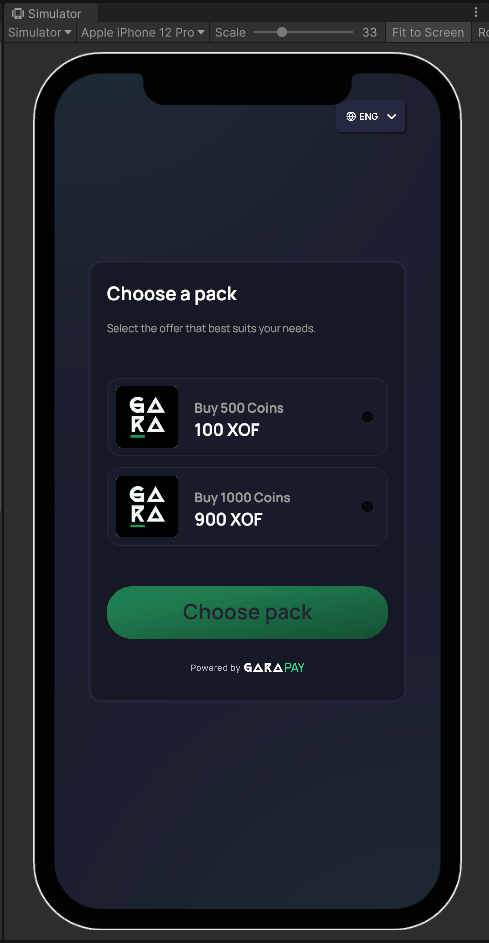
Test
Once the item is added, you can test by doing “PLAY” Normally, you will have a screen like this,
- the item icon
- the price
- the name
you have the possibility to modify their location as you wish.
from the prefab which is in:
PaymentSystem > Prefab > Product.prefab
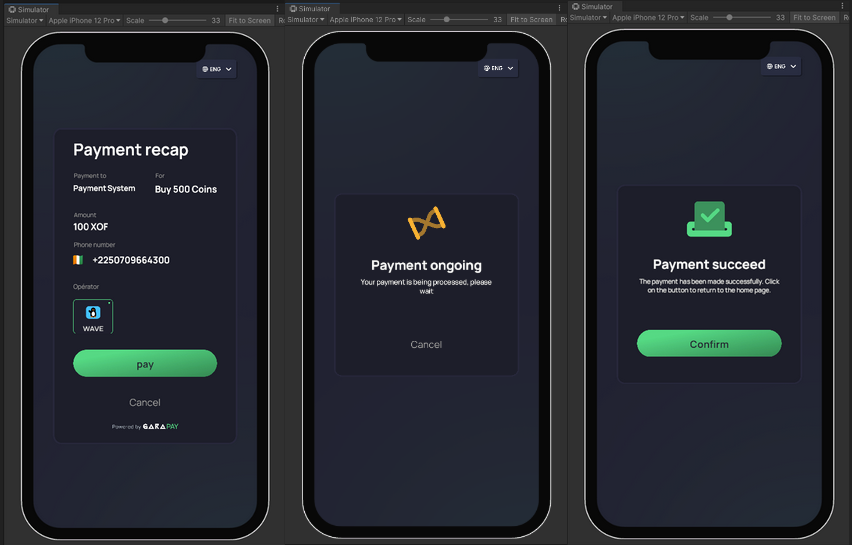
User Journey
Item selection and country selection
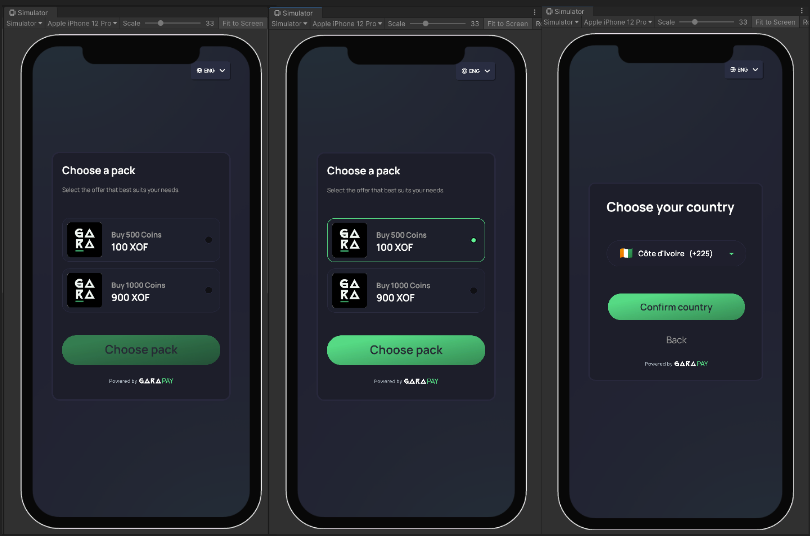
Choice of payment method and confirmation of the number

Payment summary and validation